
Watch for cracks in bricks or stone—vertical, diagonal, or horizontal—along with crumbling or missing mortar. Spalling faces, damp spots, efflorescence, and peeling paint signal moisture issues. Bulging or leaning walls, a tilting chimney, and rust stains from corroding ties are red flags. Check for sagging lintels, misaligned doors or windows, and gaps at frames. Note loose, sunken steps and frost damage like flaking bricks. If these signs show up, there’s more you can do to protect your masonry.
Key Takeaways
- Cracks in bricks or mortar—especially stair-step, widening, or near windows/doors—signal movement and need professional evaluation.
- Deteriorating or missing mortar joints allow water intrusion; crumbling joints require prompt repointing with compatible materials.
- Spalling or flaking brick faces indicate moisture or freeze-thaw damage and call for drainage fixes and unit/mortar repairs.
- Bulging, bowing, or leaning walls and chimneys show structural distress; look for gaps, tilted lintels, or shifting joints.
- Efflorescence, damp spots, musty odors, or peeling paint reveal ongoing moisture problems needing drainage, sealing, and ventilation improvements.
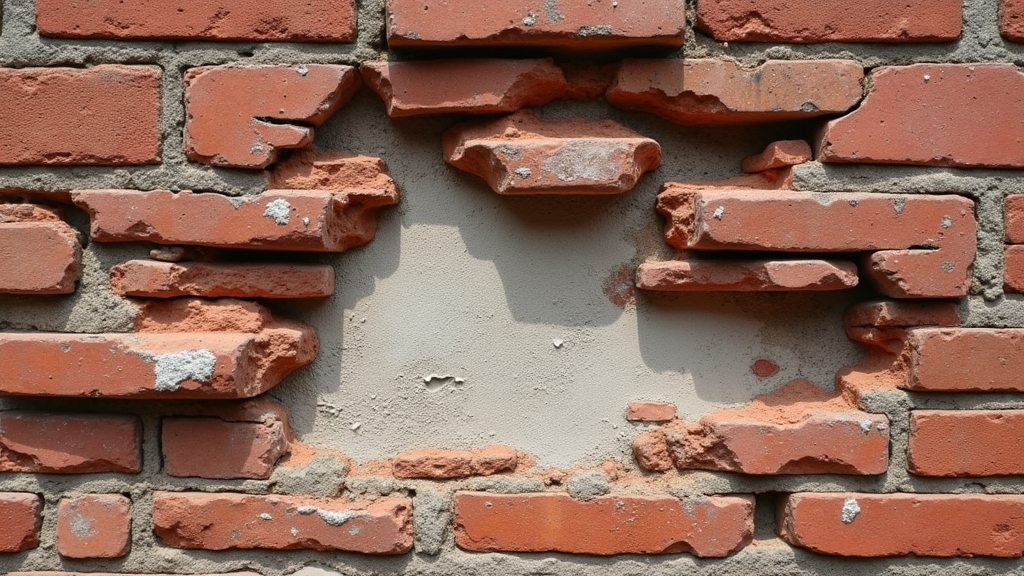
Cracks in Bricks, Blocks, or Stone
Even small cracks in bricks, blocks, or stone can signal movement or moisture problems you shouldn’t ignore. You might see hairline fractures, stair-step lines across a wall, or wider vertical gaps near corners or openings. Each pattern tells you something: vertical cracks often relate to settlement, while diagonal or stair-step cracks can point to shifting foundations. Horizontal cracks may indicate pressure from soil or freeze-thaw cycles.
Check whether cracks widen over time, allow water inside, or appear near windows, doors, or chimneys. Monitor with a pencil mark or gauge to track changes.
If you notice spreading, call a professional for evaluation and brick repair. Prompt attention protects structural integrity, prevents water intrusion, and keeps minor defects from becoming costly failures.
Deteriorating or Missing Mortar Joints
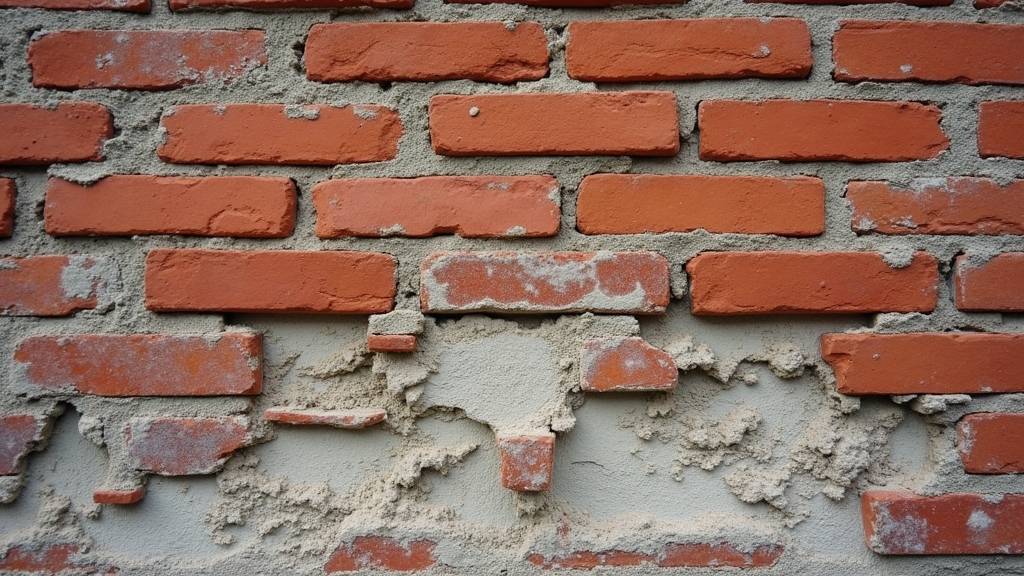
Spot deteriorating mortar by watching for crumbling mortar lines that shed grit when you touch them.
Look for gaps and voids between bricks that break the seal and loosen the wall.
Check for water intrusion signs like dark staining, efflorescence, or damp interiors that point to failing joints.
Crumbling Mortar Lines
When mortar lines start crumbling or go missing, they’re signaling that your masonry’s protective “glue” is failing. You might see sandy debris at the base of walls, powdery joints, or edges flaking under light pressure.
These symptoms let water in, weaken structural bonds, and accelerate freeze-thaw damage.
Act quickly with targeted mortar repair techniques. Test the mortar hardness, match composition and color, then rake out loose material to a proper depth before repointing.
Use the right joint profile to shed water and avoid smearing bricks. Keep work areas clean, and cure new mortar slowly to prevent cracking.
Add simple masonry maintenance tips: direct downspouts away, maintain caulking at adjacent materials, control irrigation overspray, and schedule periodic inspections to catch small failures early.
Gaps and Voids
Small gaps and open voids in mortar joints are more than cosmetic—they break the weather seal and invite water, insects, and movement into the wall.
You’ll often notice thin shadow lines, missing bits of mortar, or hairline separations at brick edges. Use simple masonry inspection techniques: run a pencil along joints to feel hollows, probe with a screwdriver for loose edges, and photograph sections to compare changes over time.
Check corners, window heads, and control joints where movement concentrates.
If gaps are limited, clean the joint, mist it, and repoint with a compatible mortar mix.
For hairline separations, consider elastic gap sealing methods that accommodate slight movement without cracking.
When voids span multiple bricks or keep reopening, call a mason to assess substrate movement.
Water Intrusion Signs
Nothing tips you off to water intrusion faster than mortar joints that crumble, wash out, or vanish entirely. When mortar fails, water sneaks into the wall, saturates bricks, and expands during freezes, widening cracks and loosening units.
You might see white efflorescence, dark damp patches, or spalling faces—all signs moisture is moving through joints instead of being shed.
Check joints at sills, parapets, and chimneys first; these take the hardest weather. Probe with a screwdriver: if it powders easily, it’s compromised.
Don’t just repoint—identify the source. Faulty flashing, clogged weep holes, or missing moisture barriers often drive recurring damage.
Combine proper repointing with targeted waterproofing techniques, such as breathable sealers, repaired flashing, and restored weeps, to stop intrusion and protect the wall’s structure.
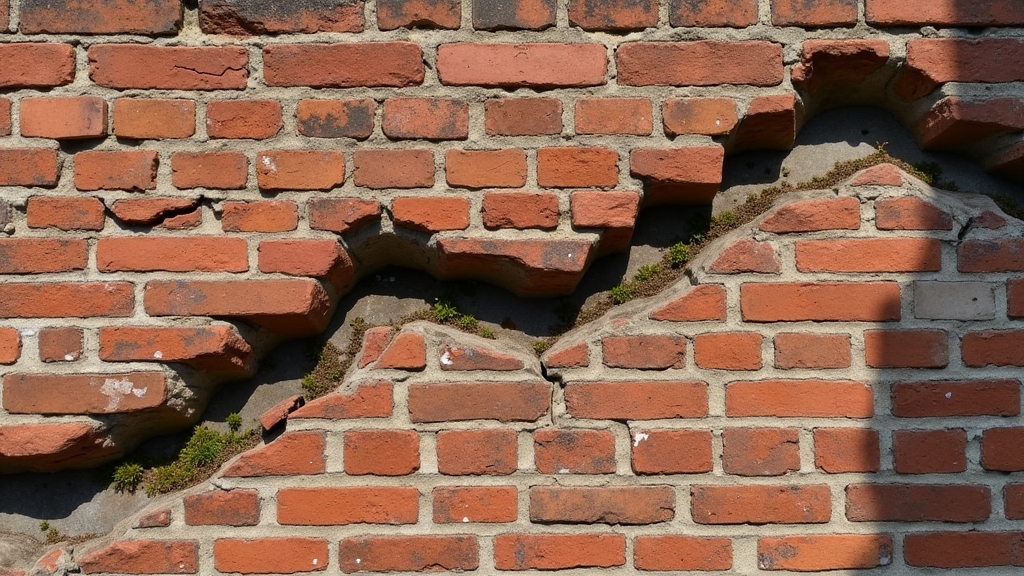
Spalling or Flaking Brick and Stone Faces
Although it can look like mere surface wear, spalling or flaking on brick and stone means the face is breaking down and shedding layers. You’re seeing moisture, salts, or freeze-thaw cycles pry off thin sheets. Common spalling causes include trapped water from failed sealants, hard Portland-based mortars on soft brick, de-icing salts, and poor drainage. Don’t ignore it—loss of the face exposes softer cores and accelerates decay.
| Sign | What it Means | Next Step |
| Chips/Flakes | Surface delamination | Assess area size |
| Hollow Sound | Debonded face | Tap-test mapping |
| Powdery Grit | Salt crystallization | Check moisture paths |
| Hairline Shelling | Early-stage spall | Plan targeted fix |
Effective repair techniques: remove loose material, repoint with compatible lime-based mortar, replace severely damaged units, improve drainage, and apply breathable water repellents—not sealers that trap moisture.
Bulging, Bowing, or Leaning Walls
When a masonry wall bulges, bows, or leans, it’s telling you that load paths and restraint have failed—often from moisture-weakened mortar, corroding embedded steel, rotted joist ends, soil pressure, or inadequate ties.
You might notice a belly in the wall, stepped cracks near corners, window lintels tilting, or gaps opening at floor lines. Don’t ignore these shifts; they signal movement that can accelerate.
Watch for bulges, stepped cracks, tilted lintels, and floor-line gaps—early warnings of accelerating wall movement.
Start with a masonry wall assessment to document where and how the wall moves. Check plumb with a level, mark changes, and photograph patterns.
Then pursue a structural integrity evaluation to determine causes and risks. A qualified professional may recommend temporary shoring, tying wythes, replacing corroded anchors, repointing, relieving loads, or rebuilding sections to restore alignment and safety.
Chimney Lean, Cracks, or Loose Chimney Caps
Even a slight chimney lean or a hairline crack can hint at serious trouble—water intrusion, frost damage, failed mortar, corroded liners, or a settling foundation. If the stack tilts, doors stick, or you notice gaps at the flashing, act fast. A loose or missing cap lets rain, debris, and animals in, accelerating decay and fire risk. Schedule a professional chimney inspection, then follow through with targeted chimney maintenance.
| Sign | Why it matters | What to do |
| Leaning stack | Structural movement | Brace, evaluate foundation |
| Stair-step cracks | Shifting joints | Repoint, monitor movement |
| Vertical crack | Thermal or settlement | Seal, assess liner |
| Spalling bricks | Moisture cycling | Replace units, improve drainage |
| Loose/missing cap | Open water path | Install secure cap |
Don’t delay; small defects multiply.
Efflorescence and White Powdery Stains
You’ve spotted chalky white stains on your brick or block, and you’re wondering what’s causing them.
Efflorescence occurs when moisture dissolves salts in the masonry and brings them to the surface as it evaporates.
Learn how to stop the moisture, clean existing deposits safely, and prevent new stains with proper sealing, drainage, and ventilation.
What Causes Efflorescence
Although it looks alarming, efflorescence is simply salt deposits brought to the surface by moisture. You see it when water enters masonry, dissolves salts within brick, mortar, or concrete, then evaporates and leaves a white, powdery crust. The primary causes of efflorescence include porous materials, driven rain, vapor migration from damp interiors, and new construction moisture. Deicing salts and ground contact can add to the salt load. It’s a moisture-and-salt transport issue, not mold.
| Source | Role in Efflorescence | What to Watch |
| Masonry salts | Provide soluble minerals | New brick/mortar |
| Rain/intrusion | Moves salts outward | Leaks, failed joints |
| Groundwater | Wicks upward | Missing capillary breaks |
| Interior humidity | Drives vapor | Poor ventilation |
| Climate cycles | Evaporation patterns | Freeze-thaw, wind |
Understanding the causes of efflorescence helps you plan smart prevention strategies without guessing.
Prevention and Removal Tips
Because efflorescence is a moisture-and-salt transport issue, focus first on controlling water, then clean what’s left behind.
Start with drainage: slope soil away from walls, keep gutters clear, extend downspouts, and seal flashing gaps. Fix cracked mortar and hairline joints to block water paths—simple repair techniques like tuckpointing or caulking help.
Improve drying. Increase airflow in basements, use dehumidifiers, and avoid trapping moisture with non-breathable coatings. Choose breathable sealers designed for masonry; avoid glossy film-formers that can worsen salt buildup.
For removal, start gently. Dry-brush crystals, then rinse with low-pressure water. If stains persist, use a mild, masonry-safe cleaner or a diluted vinegar solution; neutralize and rinse thoroughly.
Test a small area first. Ongoing inspections and these masonry maintenance tips prevent recurrence.
Water Intrusion, Damp Spots, and Mold Near Masonry
Moisture is a red flag when it shows up around brick, stone, or block. If you notice damp spots, dark patches, or a musty smell along interior walls near masonry, water is getting in. That intrusion can lead to water damage, crumbling mortar, stained surfaces, and mold growth that affects indoor air.
Check for efflorescence—white, powdery salts—since it signals ongoing moisture movement. Pay attention to peeling paint, spalling brick faces, or soft, sandy mortar; these are early warnings that moisture is breaking materials down.
Look closely after rain or snowmelt. Are basement corners wet? Do you see moisture at the base of exterior walls? Catching these signs early helps you avoid structural decay and costly remediation.
Call a qualified mason to diagnose sources and restore proper moisture protection.
Settling, Sagging Lintels, and Door/Window Misalignment
When foundations shift or supports lose strength, masonry starts telling on itself. You’ll notice cracks radiating from window and door corners, stair-step cracks in brick, or gaps opening at trim. These point to settlement issues and structural shifts that stress the wall.
Check lintels above openings. If a steel lintel sags, rusts, or bows, bricks may dip or separate, and mortar may crush. Doors and windows that stick, scrape, or won’t latch reliably often signal movement, not just humidity.
Look for uneven reveals around frames, daylight at one edge, or shims added as quick fixes.
Act early. Document changes with photos, measure gaps, and schedule a professional assessment. Targeted repairs—lintel replacement, tuckpointing, and stabilization—protect your masonry and prevent escalating damage.
Loose, Wobbly, or Sunken Steps and Walkways
Shifts that distort openings often show up underfoot too, as steps and walkways loosen, rock, or sink. When you feel movement underfoot, your masonry’s base may have eroded, compacted, or lost proper support.
Loose treads, separated risers, and gaps at joints signal failing mortar or displaced units. Don’t ignore trip edges; they point to compromised step stability and can worsen quickly.
Check for rocking stones, hollow sounds, and pooled water near edges. Probe joints for crumbling mortar, and look for hairline cracks radiating from high-traffic areas.
Prioritize walkway maintenance by resetting displaced pavers, repointing joints, and releveling settled sections with a stable base. Replace broken units and add firm edging to prevent spread.
Addressing movement early preserves structure, safety, and curb appeal.
Frost Damage and Freeze–Thaw Deterioration
Even after a mild thaw, hidden ice can pry your masonry apart. When water slips into tiny cracks and pores, frost penetration drives it deeper. As temperatures drop, it freezes, expands, and widens those gaps.
Repeated freeze cycles push faces off bricks, pop mortar, and leave gritty sand at the base. You might see flaking surfaces, crumbling joints, whitish crusts, or damp lines that dry slowly. Corners and parapets often show damage first because they’re most exposed.
Freeze-thaw cycles flake bricks, pop mortar, and leave gritty sand—corners and parapets fail first.
Run your hand over the wall; if it powders easily or sounds hollow when tapped, deterioration’s underway. Sealants that peel, open hairline cracks, and spalled brick faces all signal rising moisture movement.
Act quickly: improve drainage, clear clogged weeps, repoint weak joints, and replace severely spalled units before winter returns.
Rust Stains and Corroded Metal Ties or Lintels
Freeze–thaw damage isn’t the only threat; reddish streaks or shadowy lines on the wall often point to rusting metal ties or lintels buried in the masonry.
You’re seeing iron bleed through mortar joints or beneath window heads, which signals expanding corrosion that can crack bricks, bow walls, or loosen veneer.
Don’t ignore it. Probe stained areas, look for spalling, and check for gaps above openings where lintels sit.
If a magnet sticks along joints, you’ve likely found a corroding tie. Address the source: redirect roof runoff, clear weep holes, and fix flashing.
For rust prevention and metal maintenance, have a pro assess load-bearing components, remove failed sections, treat steel with rust inhibitors, and install galvanized or stainless replacements.
Repoint with compatible mortar to seal out moisture.
Frequently Asked Questions
How Often Should Masonry Be Professionally Inspected for Preventative Maintenance?
Schedule professional masonry inspections every 1–2 years. This masonry inspection frequency catches small issues early. For preventative maintenance tips: monitor joints, seal cracks, manage drainage, clean gently, and document changes. After storms or frost cycles, don’t wait—book an extra inspection.
What Qualifications Should I Look for in a Masonry Contractor?
Look for masonry certifications, proven contractor experience, proper licensing, and insurance. Verify manufacturer training, OSHA safety compliance, references, and detailed bids. Check portfolio quality, local code knowledge, warranty terms, and communication clarity so you can compare contractors confidently and avoid costly rework.
Can Historic Masonry Be Repaired Without Losing Its Original Appearance?
Yes, you can repair historic masonry without losing its original appearance. Prioritize historic restoration methods: gentle cleaning, mortar analysis, color-matched lime repointing, selective brick replacement, and reversible treatments. These steps guarantee appearance preservation while maintaining structural integrity and authenticity.
How Do Seasonal Maintenance Routines Differ for Masonry in Cold vs. Warm Climates?
You adjust masonry maintenance by climate effects: in cold regions, prioritize sealing, prompt repointing, de-icing alternatives, and freeze-thaw inspections; in warm climates, emphasize UV protection, expansion-joint checks, efflorescence cleaning, and irrigation control to prevent moisture intrusion and thermal stress.
Will My Homeowners Insurance Cover Masonry Repairs or Restoration Work?
Yes—sometimes. You’re usually covered for sudden, accidental damage, not wear or neglect. Review policy exclusions, deductibles, and limits. Ask your insurer about endorsements, claim requirements, and how insurance coverage interacts with masonry costs, inspections, and contractor estimates.
Final Thoughts
Spotting masonry problems early isn’t just about appearances—it’s about protecting your home’s structure, safety, and value. Cracks, crumbling mortar, flaking brick, bulging walls, leaning chimneys, sagging lintels, or rust stains are all warning signs that shouldn’t wait. Addressing these issues promptly can prevent costly repairs and extend the life of your masonry for years to come.
If you’ve noticed any of these signs—or even suspect something might be wrong—don’t delay. Schedule a professional inspection and repair today to safeguard your home before minor issues turn into major structural problems.
At Premiere Masonry Rochester Hills, our team specializes in expert masonry restoration, tuckpointing, lintel repair, chimney rebuilding, and porch restoration. We combine craftsmanship, precision, and durable materials to make your brickwork stronger and more beautiful than ever.
Call Premiere Masonry Rochester Hills today or visit our Contact Page to schedule your free consultation. Protect your investment and restore your home’s curb appeal with trusted local masonry experts.