Restoring masonry requires a step-by-step process. First, you’ll assess the condition, identifying issues like cracks and water damage. Then, you’ll thoroughly clean the surfaces using gentle methods. Next, you’ll address structural defects and mortar deterioration to guarantee long-term stability. Carefully repairing or replacing damaged brickwork and stone surfaces comes next. Maintaining proper drainage and applying protective sealants are also essential. Regular inspections and timely repairs are key to preserving your masonry’s historic integrity. If you’d like to dive deeper into the details of this process, let’s continue exploring.
Key Takeaways
- Assess the masonry condition by evaluating signs of deterioration, analyzing mortar quality, and documenting findings to guide the restoration process.
- Implement proper cleaning and preparation techniques, including gentle scrubbing, low-pressure water washing, and chemical cleaners, to ensure effective bonding of new materials.
- Address structural defects, such as cracks and spalling, through appropriate repair methods, including crack injection, stone replacement, and reinforcement, to ensure long-term stability.
- Restore damaged brickwork and stone surfaces by selecting compatible replacement materials, employing restoration techniques, and applying high-quality sealants for protection.
- Establish proactive inspection and maintenance procedures, including regular cleaning, timely repairs, and professional evaluations, to preserve the integrity of the restored masonry.
Assessing the Masonry Condition
Before beginning any masonry restoration work, it’s vital to thoroughly evaluate the condition of the existing masonry. This involves employing various masonry inspection techniques to identify signs of deterioration.
Look for cracks, spalling, erosion, and signs of water damage. Examine the mortar for crumbling, missing joints, and discoloration. Analyze the overall structural integrity of the masonry.
Cracks, spalling, erosion, and water damage. Examine mortar for crumbling, missing joints, and discoloration. Analyze the overall structural integrity.
Use tools like magnifying glasses, borescopes, and moisture meters to conduct a thorough assessment. Documenting your findings through photographs and detailed notes will help guide the restoration process.
Only by accurately evaluating the masonry’s current state can you develop an effective plan to restore its structural soundness and visual appeal. This thorough evaluation is the critical first step in the masonry restoration journey.
Cleaning and Preparation
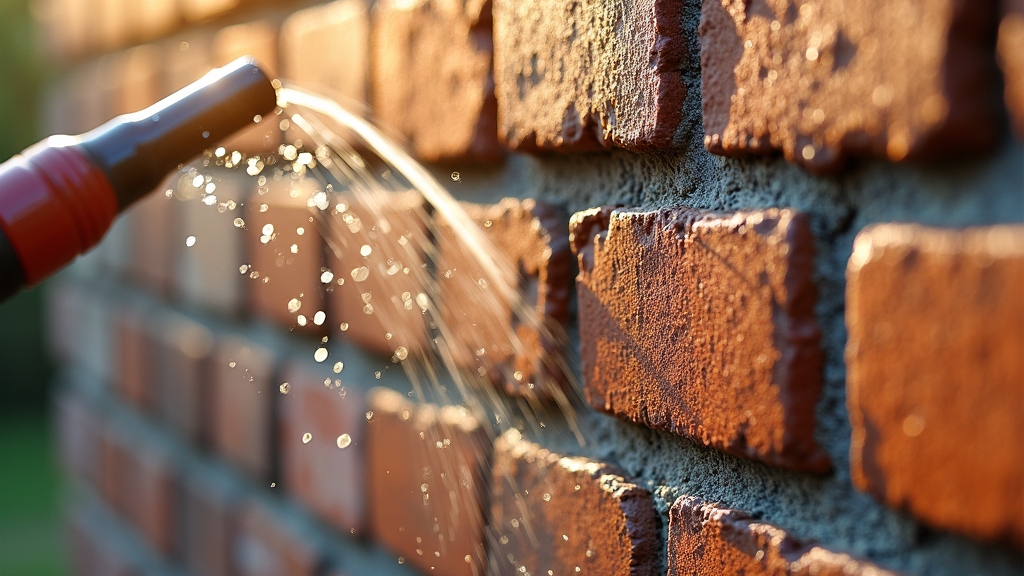
Once the masonry condition has been thoroughly assessed, the next step is to prepare the surface for restoration.
This involves a meticulous cleaning process to remove any dirt, debris, or previous coatings that may be present. Commonly used cleaning techniques include gentle scrubbing with soft-bristle brushes, low-pressure water washing, and the application of chemical cleaners specifically formulated for masonry surfaces.
It’s essential to exercise caution and test any cleaning methods on a small, inconspicuous area to guarantee they don’t cause further damage.
Proper surface preparation lays the groundwork for successful masonry restoration, allowing the new materials to bond effectively with the underlying structure.
This step requires careful attention to detail and a commitment to preserving the historic integrity of the masonry.
Repairing Structural Defects
After the surface has been thoroughly cleaned, the next essential step in the masonry restoration process is addressing any structural defects.
Repairing these issues is vital for ensuring the long-term stability and integrity of the masonry structure. The process typically involves:
- Evaluating the extent and severity of the structural defects, such as cracks, spalling, or displacement.
- Determining the underlying causes, which may include foundation instability, excessive loading, or environmental factors.
- Implementing appropriate repair techniques, such as crack injection, stone replacement, or reinforcement, to address the specific issues.
- Ensuring proper load distribution and foundation stability to prevent future problems.
Addressing these structural defects is a key component of the masonry restoration process, laying the groundwork for a successful and lasting renovation.
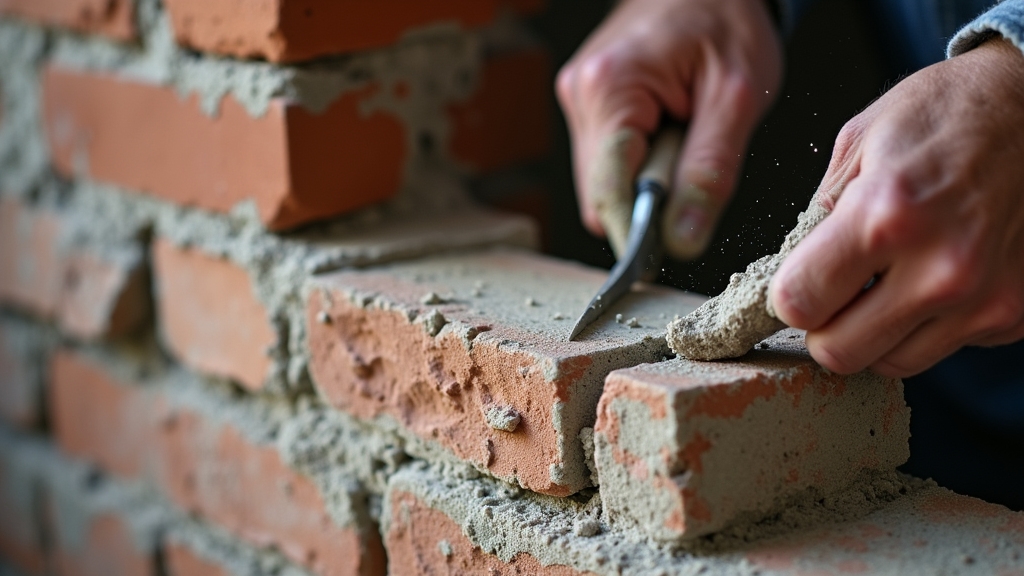
Addressing Mortar Deterioration
While addressing structural defects is vital, the masonry restoration process must also tackle the deterioration of mortar. Mortar, the binding agent between bricks or stones, can deteriorate over time due to weathering, structural movement, or improper initial installation.
To tackle this issue, you’ll need to understand the different types of mortar and the appropriate repair techniques.
Soft, crumbling mortar may require raking and repointing, where the old mortar is carefully removed and replaced with a compatible new mix. For severely damaged areas, you might need to evaluate mortar removal and replacement.
Additionally, using the right mortar type – whether it’s lime-based or cement-based – is essential for maintaining the structural integrity and aesthetic appeal of the masonry.
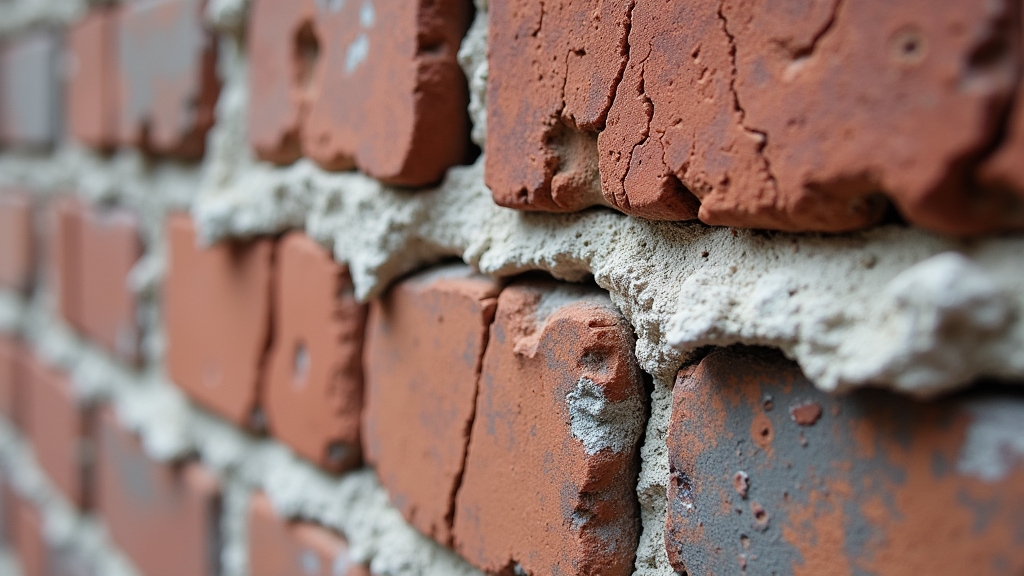
Restoring Damaged Brickwork
Addressing mortar deterioration is just one aspect of the masonry restoration process.
Restoring damaged brickwork is another critical component. When it comes to brick selection, you’ll want to choose replacement bricks that closely match the existing ones regarding color, texture, and size. This guarantees a seamless integration into the existing structure.
When restoring damaged brickwork, it’s crucial to select replacement bricks that closely match the existing ones in color, texture, and size.
The restoration techniques employed for damaged brickwork include:
- Brick replacement: Carefully removing and replacing severely damaged bricks.
- Brick repair: Patching and repairing minor cracks or chips in the existing bricks.
- Repointing: Removing and replacing deteriorated mortar joints to strengthen the masonry.
- Surface cleaning: Gently cleaning the brickwork to remove dirt, stains, or other surface imperfections.
Treating Stone Surfaces
Cleaning stone surfaces is essential to reviving their appearance.
Repairing damaged stone can restore its structural integrity.
Sealing stone surfaces protects them from future deterioration.
Cleaning Stone Surfaces
Once the stone surface has been properly assessed, the next step in the masonry restoration process involves cleaning the stone.
Effective stone cleaning techniques include:
- Gentle Pressure Washing: Using a low-pressure water stream, you can remove surface dirt, grime, and organic growth without damaging the stone.
- Eco-Friendly Cleaners: Opt for pH-balanced, biodegradable cleaners that are specifically designed for stone surfaces, minimizing environmental impact.
- Poultice Cleaning: Applying a poultice, a paste-like material, can help draw out embedded stains and discoloration from the stone.
- Laser Cleaning: Utilizing laser technology, you can selectively remove unwanted materials without altering the stone’s surface.
Proper cleaning is essential to restore the stone’s original appearance and prepare it for further restoration steps.
Repairing Damaged Stone
After the stone surface has been thoroughly cleaned, the next step in the masonry restoration process involves repairing any damaged areas.
Carefully assess the extent of the damage and select the appropriate stone for restoration. Aesthetic considerations are vital, as the repaired area should seamlessly blend with the surrounding stone.
Use mortar that matches the original in color and texture, and apply it with precision to guarantee a smooth, uniform finish.
Take the time to properly prepare the surface and apply the new stone, securing a durable and visually appealing result.
Proper repair techniques are fundamental for preserving the integrity and aesthetic appeal of the masonry structure.
Sealing Stone Surfaces
With the stone surface now properly repaired, the next step in the masonry restoration process is to seal and protect the treated areas.
Applying high-quality stone sealants is vital for long-term surface protection. This process involves:
- Selecting the appropriate sealant based on the stone type and desired finish.
- Thoroughly cleaning the surface to guarantee proper adhesion.
- Applying the sealant according to the manufacturer’s instructions, often using a spray or roller application.
- Allowing the sealant to fully cure, assuring a durable and water-resistant finish.
Preserving Concrete Elements
Preserving concrete elements is vital for maintaining the structural integrity and aesthetic appeal of your building.
Concrete preservation techniques, such as sealers and coatings, can protect the surface from weathering, chemical attacks, and physical wear. By applying these concrete surface treatments, you can extend the lifespan of your concrete and prevent costly repairs down the line.
Regular inspection and maintenance are essential to identify and address any issues early on. This proactive approach guarantees your concrete elements remain strong, durable, and visually appealing for years to come.
With the right preservation strategies, you can safeguard your investment and keep your building in top condition.
Ensuring Proper Drainage and Waterproofing
Guaranteeing proper drainage and waterproofing is essential for protecting your building’s concrete elements from water damage. Effective drainage systems and waterproofing techniques can help prevent issues like leaks, mold, and structural deterioration.
Here are four key considerations for guaranteeing proper drainage and waterproofing:
- Install effective drainage systems: Properly designed and installed drainage systems, such as downspouts, gutters, and land grading, can redirect water away from your building’s foundation and walls.
- Utilize waterproofing membranes: Apply waterproof membranes or coatings to your building’s concrete surfaces to create a barrier against water infiltration.
- Inspect and maintain regularly: Regularly inspect your drainage systems and waterproofing to identify and address any issues before they become major problems.
- Consider professional assistance: Consult with masonry restoration experts to guarantee your drainage and waterproofing solutions are effective and tailored to your building’s specific needs.
Maintaining the Restored Masonry
Maintaining the restored masonry requires a regular cleaning schedule to keep it looking its best.
Proactive inspection procedures can help you identify and address any issues early on.
Timely repair recommendations from professionals will guarantee the longevity of your masonry restoration.
Regular Cleaning Schedule
Regularly cleaning the restored masonry is essential to prolonging its condition and appearance. Following a consistent cleaning schedule helps maintain the investment you’ve made in restoring your masonry.
Here are some masonry maintenance tips and cleaning frequency guidelines:
- Inspect the masonry regularly, at least twice a year, to identify any issues that require attention.
- Gently clean the masonry using a mild, pH-neutral detergent and soft-bristle brush every 6-12 months, depending on environmental factors.
- Avoid using harsh chemicals or high-pressure water, as these can damage the masonry and mortar.
- Consider professional cleaning every 3-5 years to guarantee thorough and safe maintenance of the restored masonry.
Proactive Inspection Procedures
Proactively inspecting the restored masonry is key to preserving its integrity.
Establish a preventive maintenance schedule to catch issues early. Inspect the masonry regularly – monthly, quarterly, or annually depending on its condition.
Look for cracks, spalling, erosion, and signs of water infiltration. Note the extent and location of any damage. Documenting findings enables you to track changes over time and plan future restoration work.
Frequent inspections allow you to address small problems before they escalate. Catch issues early, and the masonry will continue to protect your building’s structural integrity.
Proactive maintenance is the best way to maximize the lifespan of your restored masonry.
Timely Repair Recommendations
Once the masonry has been restored, the key to preserving its integrity lies in addressing any issues promptly.
Regular seasonal maintenance and timely repair recommendations are essential. Here are four critical steps to maintain the restored masonry:
- Conduct biannual inspections to identify potential problems, such as cracks, discoloration, or water damage.
- Address emergency repairs, like missing mortar or loose bricks, immediately to prevent further deterioration.
- Schedule seasonal maintenance, including repointing, cleaning, and sealant application, to protect the masonry.
- Consult with a professional masonry contractor for thorough evaluations and tailored repair recommendations.
Frequently Asked Questions
How Long Does the Masonry Restoration Process Typically Take?
The masonry restoration process can take anywhere from a few weeks to several months, depending on the project’s timeline factors and complexity. It’s best to consult with a professional to get an accurate timeline for your specific needs.
What Is the Average Cost of a Masonry Restoration Project?
The average cost of a masonry restoration project varies, but you can expect to spend anywhere from $5,000 to $30,000 or more depending on the project’s scope. Proper budget planning and understanding the cost breakdown are essential for a successful masonry restoration.
Can Homeowners Perform Masonry Restoration Work Themselves?
You can do some DIY masonry restoration, but it’s best to hire a professional for major projects. Safety precautions are essential – improper techniques could damage your home. Consult an expert to guarantee the job is done right.
How Often Should Masonry Be Inspected and Maintained?
You should inspect your masonry annually and maintain it regularly to prevent damage. Follow masonry maintenance tips like sealing cracks, cleaning, and repointing to keep your home in top shape.
What Are the Environmental Factors That Impact Masonry Durability?
The key environmental factors that impact masonry durability are water absorption and freeze-thaw cycles. Water seeping into the masonry can lead to cracking and degradation, especially when temperatures drop and the water freezes and expands.
Final Thoughts
You’ve now seen how the full masonry restoration process works—from detailed assessments and gentle cleaning to structural repairs, mortar replacement, stone treatment, drainage improvements, and long-term maintenance. Every step is essential to restoring both the strength and beauty of your masonry while protecting it from moisture, movement, and weathering for decades.
If you’re noticing cracks, spalling, deteriorated mortar, water stains, or shifting brickwork, early intervention is key. Professional restoration ensures correct material matching, long-term stability, and durability—results DIY fixes simply can’t match.
At Premiere Masonry Rochester Hills, we specialize in complete masonry restoration, precise tuckpointing, structural lintel repair, expert fireplace & chimney repair, and reliable porch repair & rebuilding. Our work blends traditional craftsmanship with modern restoration techniques for lasting results.
Ready to restore your masonry with precision and care? Call Premiere Masonry Rochester Hills or visit our Contact Page to schedule your free consultation.
Protect your home’s structure, beauty, and value with trusted local masonry experts—done right the first time.